Difference between revisions of "GeoLink Mounting"
| Line 21: | Line 21: | ||
Some helicopters are equipped with fuselages instead of a boom. In that case there is chance you will have to spend time to achieve flat mounting surface. | Some helicopters are equipped with fuselages instead of a boom. In that case there is chance you will have to spend time to achieve flat mounting surface. | ||
| + | |||
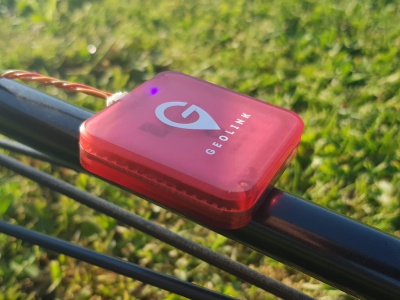
[[File:geolink-horizontal.jpg|400px|Mounting example: Horizontal 0°]] | [[File:geolink-horizontal.jpg|400px|Mounting example: Horizontal 0°]] | ||
''Mounting example: Horizontal 0°'' | ''Mounting example: Horizontal 0°'' | ||
Revision as of 09:06, 28 May 2018
Correct mounting is the most important for achieving optimal operating condition. If done improperly GeoLink will be unable to work with great precision or in the worst case some functionality could be even not usable.
Please take special care in order to perform the following steps thoroughly.
Mounting on your helicopter
As of now, module must be mounted always horizontally so that GeoLink logo is at the top. You can select from two positions:
- Horizontal (0°) - connector is pointing to main rotor
- Horizontal (180°) - connector is pointing to tail rotor
GeoLink module should be mounted ideally at the TAIL BOOM. This is usually the best position for achieving optimal performance. Optimal position should meet the following:
- It is at least 5cm far from a rigid conductive parts such as carbon frame
- It is at least 5cm far from any electronics (especially servos)
- It is at least 8cm far from an electric motor
- It has clear sky visibility
- It is perfectly horizontally aligned
Module attachment is normally performed by provided Double Sided tape. Provided tape has extremely good bonding properties so that it can hold more than better even when only two rails of the tape is used.
Some helicopters are equipped with fuselages instead of a boom. In that case there is chance you will have to spend time to achieve flat mounting surface.
Mounting example: Horizontal 0°
