Difference between revisions of "GeoLink Mounting/it"
(Created page with "Opzionalmente è possibile utilizzare un supporto di montaggio di terze parti progettato per i moduli GPS.") |
(Created page with "Non montare mai GeoLink direttamente su parti metalliche spesse, vicino a un motore o un servo.") |
||
| Line 35: | Line 35: | ||
Opzionalmente è possibile utilizzare un supporto di montaggio di terze parti progettato per i moduli GPS. | Opzionalmente è possibile utilizzare un supporto di montaggio di terze parti progettato per i moduli GPS. | ||
<br/> | <br/> | ||
| − | {{Quote|''' | + | {{Quote|'''Non montare mai GeoLink direttamente su parti metalliche spesse, vicino a un motore o un servo.'''}} |
<p></p> | <p></p> | ||
{{Quote|'''Do not cover GeoLink connector with any tape, glue or paint. Opening above the connector is used to determine ambient pressure and altitude.'''}} | {{Quote|'''Do not cover GeoLink connector with any tape, glue or paint. Opening above the connector is used to determine ambient pressure and altitude.'''}} | ||
Revision as of 17:51, 15 January 2021
Il montaggio corretto è fondamentale per ottenere condizioni operative ottimali. Se fatto in modo improprio GeoLink non sarà in grado di funzionare con grande precisione o nel peggiore dei casi alcune funzionalità potrebbero essere addirittura non utilizzabili.
Si prega di prestare particolare attenzione al fine di eseguire completamente i seguenti passaggi.
Contents
1 In montaggio sul tuo elicottero
A partire da ora, il modulo deve essere montato sempre in orizzontale in modo che il logo GeoLink sia in alto. Puoi scegliere tra due posizioni:
- Orizzontale (0 °) - Il connettore punta al rotore principale
- Orizzontale (180 °) - il connettore punta al rotore di coda
Prima del montaggio effettivo, consultare la sezione Allineamento.
1.1 Dove montare modulo
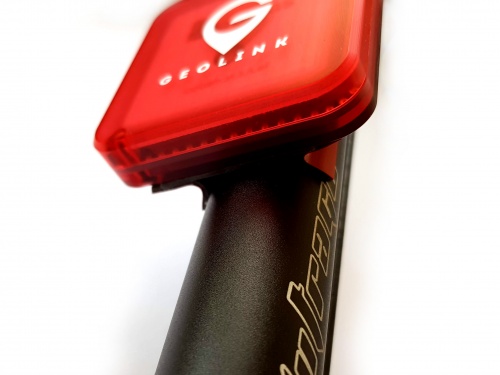
Il modulo GeoLink dovrebbe essere montato idealmente sul TAIL BOOM. Questa è solitamente la posizione migliore per ottenere prestazioni ottimali. La posizione ottimale dovrebbe soddisfare quanto segue:
- È distante almeno 5 cm da parti conduttive rigide come telaio in carbonio o bulloni
- È distante almeno 5 cm da qualsiasi elettronica (specialmente servi)
- È distante almeno 8 cm da un motore elettrico
- Si trova a una distanza di almeno 30 cm da qualsiasi magnete (in particolare supporti magnetici a baldacchino)
- Ha una chiara visibilità del cielo
- È perfettamente allineato orizzontalmente
Scegli una posizione non troppo lontana, in modo che il cavo in dotazione sia abbastanza lungo. Posizionare il modulo troppo lontano sul braccio potrebbe portare a un cattivo centro di gravità del modello.
1.2 Come montare modulo
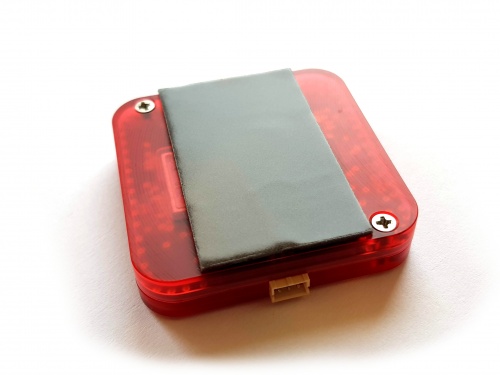
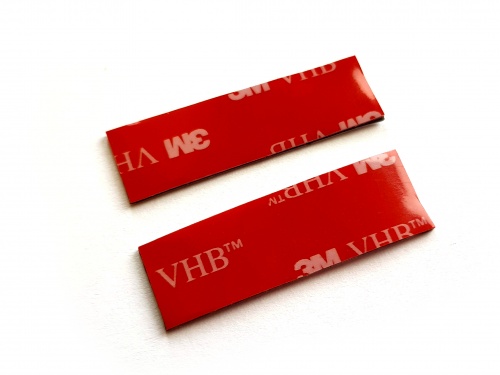
Il fissaggio del modulo viene normalmente eseguito mediante nastro biadesivo fornito. Il nastro fornito ha proprietà di incollaggio estremamente buone in modo che possa trattenere più che meglio anche quando vengono utilizzati solo due binari del nastro.
Alcuni elicotteri sono dotati di una fusoliera invece del classico tubo di coda. In tal caso, è possibile che si debba dedicare più tempo per ottenere una superficie di montaggio piatta.
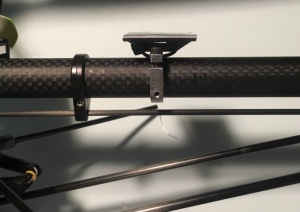
Opzionalmente è possibile utilizzare un supporto di montaggio di terze parti progettato per i moduli GPS.
Non montare mai GeoLink direttamente su parti metalliche spesse, vicino a un motore o un servo.
Do not cover GeoLink connector with any tape, glue or paint. Opening above the connector is used to determine ambient pressure and altitude.
Each circuit containing antennas is very carefully designed to achieve correct impedance. Impedance is electrical property which is directly determining performance of antenna. Impedance is changing immediately by placing any parts close to the circuit, especially near antenna. Because PCB is acting as a part of GPS antenna any change to the PCB, including screws has noticeable impact. Thus we highly do not recommend doing any hardware changes to GeoLink module.
1.3 Mounting with provided tape
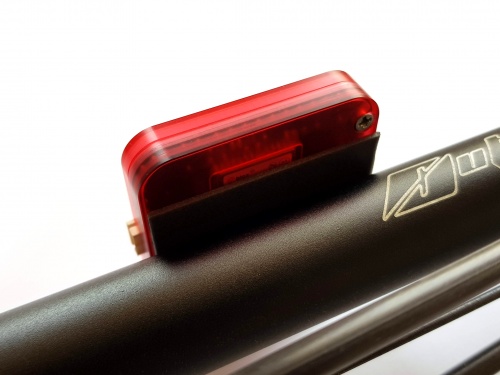
1. Take the first piece of tape and glue it approximately in the middle.
2. Attach the module at the tail boom.
3. Divide second piece of tape.
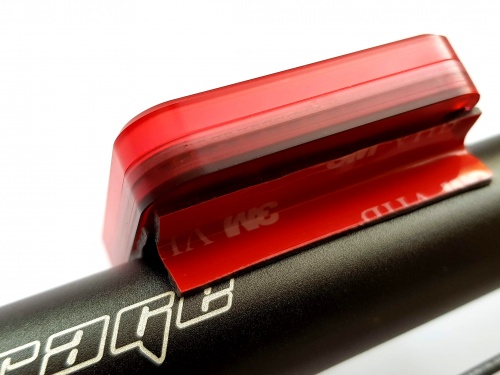
4. While holding folded tape in two fingers insert it between module and boom to create support (from both sides). With a finger or a tool try to insert both pieces as far as possible so that adhesive surfaces are holding well.
The tape will shortly adhere on the surface tightly and can't be reused anymore.
1.4 Unmounting
In some cases pilot might need to remove GeoLink from a model, for example during a repair. When provided double sided is used a special care must be taken!
Always try to pull out double sided tape first, not the module. Lastly rotate with the module gently until double sided tape will peel off.
Never pull the module in any way when mounted with double sided tape! This could bent or crack the plastic enclosure.
1.5 Mounting examples
Mounting can be done also in other ways. Please see following photos.
1.5.1 LYNX Oxy 2
1.5.2 KDS Chase 360
1.5.3 SAB Goblin 700
2 Wiring
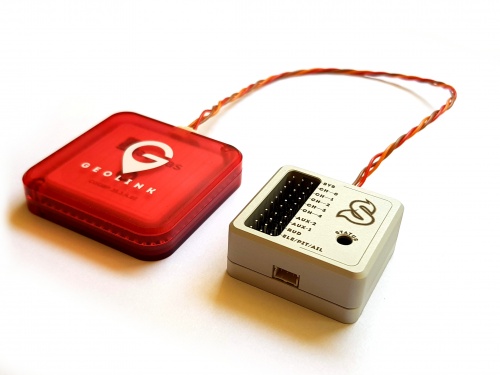
Wiring is done through one JST to JST cable with length of 22cm which is supplied with GeoLink. Longer cable is possible and will be available. For GPS itself a shorter cable is better, because any additional cables attached to the module and Spirit unit could distort the signal.
μSpirit Primary satellite port (SAT) Spirit Primary satellite port Spirit 2 Secondary satellite port (SAT2) Spirit Pro Secondary satellite port
3 Alignment
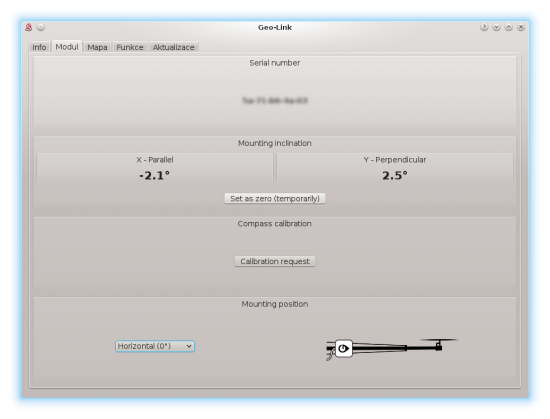
Since it is uneasy to visually align the module perfectly, the GeoLink has built-in digital level in the Spirit Settings. There you can see how to align the module and perform a necessary adjustments.
3.1 Alignment procedure
Alignment can be done prior the mounting or even later, as needed.
- Connect GeoLink and Spirit unit with provided cable (while GeoLink being not mounted yet).
- Power up the Spirit unit.
- After initialization start the Spirit Settings software.
- Open General tab - GeoLink module settings.
- Move to the Module tab there.
- Place GeoLink at a flat, aligned horizontal surface anywhere on your model in order to get a precise reference. (for example the Spirit unit)
- Click Set as zero (temporarily) button to reset angle of built-in protractor.
- Move GeoLink to a desired mounting position.
- Mount it with provided double sided tape at position ideally with 0° deflection.

