Difference between revisions of "GeoLink Configuration/hu"
(Created page with "Új földrajzi kerítés programozás") |
(Created page with "A Geo-kerítést akár a Spirit Setting beállításokkal is programozhatja, ha kiválasztja a pontokat a térképen. Vagy lehetőség van a GeoLink csatorna használatával e...") |
||
| Line 88: | Line 88: | ||
=== Új földrajzi kerítés programozás === | === Új földrajzi kerítés programozás === | ||
| − | + | A Geo-kerítést akár a Spirit Setting beállításokkal is programozhatja, ha kiválasztja a pontokat a térképen. Vagy lehetőség van a GeoLink csatorna használatával erre akkor is, ha nincs kéznél a számítógépe. | |
If assigned GeoLink channel is used you have to set '''On (2)''' function state and keep it on for at least 2 seconds. At this period Status LED of the unit will turn off and after 2 seconds new Geo-fence point is programmed. | If assigned GeoLink channel is used you have to set '''On (2)''' function state and keep it on for at least 2 seconds. At this period Status LED of the unit will turn off and after 2 seconds new Geo-fence point is programmed. | ||
Revision as of 09:05, 23 August 2020
Contents
1 GeoLink Támogatás
A GeoLink a firmware 2.5-es verziójától támogatott. Az összes funkció használatához először engedélyeznie kell a támogatást a Spirit Settings - General fülön (General Tab). Az engedélyezés után mentse el a beállításokat, és indítsa újra a modellt.
2 Iránytű kalibrálása
Az összes GeoLink modult teljes mértékben tesztelték és kalibrálták. Azonban pilóta számára talán szükséges lehet, az iránytű újra kalibrálása. Az iránytű elengedhetetlen a modell irányának meghatározásához a helyes navigációhoz, a valódi helyzetekben. Az iránytű érzékeli a Föld mágneses mezejét (Geo-mágneses mező), és így határozza meg az irányt. Sajnos a Geo-mágneses mező mindenütt más. Ezért ha a modellt a Cseh Köztársaságon kívül üzemeltetik, akkor nagyon ajánlott az új kalibrálás elvégzése. A GeoLink modulokat gyárilag a Cseh Köztársaság területére kalibrálták.
2.1 Hogyan lehet ellenőrizni?
Annak ellenőrzése érdekében, hogy a GeoLink megfelelően van-e kalibrálva az Ön területén, indítsa el a Spirit Settings elemet, és nyissa meg a GeoLink settings beállítások ablakot. Az Info fül-ön láthatja az aktuális fejléc értéket.
Kérjük, helyezze a modellt, vagy csak a GeoLink-t Észak felé, a lehető legközelebb, hogy a modell repülési iránya az egységen ábrázolt nyíllal párhuzamos legyen. Ideális összehasonlítani egy analóg iránytűvel.
FONTOS: A fejléc olvasásakor ügyeljen arra, hogy a modell vízszintes síkban legyen. Tehát a Modul fül-ön (tab) 0°-os dőlést fog látni. Mivel egyes modellek, például a SAB Goblin, az MSH Protos farok csöve, -ferde, előbb a modell nulla dőlését kell megtalálni.
Északi irányban kb. 90 ±4° -ot kell látnia. A mért érték nem lehet ettől távol.
Javasoljuk, hogy ne használjon intelligens eszközöket az iránytű irányának összehasonlításához. Ezeket általában egyáltalán nem kalibrálják, és nem is teszik lehetővé a kalibrálást. Az analóg iránytű a legjobb az összehasonlításhoz.
2.2 Furcsa viselkedés
Ha az iránytű kalibrálása rossz, akkor azt fogja észrevenni, hogy az olyan funkciók, mint a Geo-kerítés, a Hazatérés, a Pozíció tartás, nem működnek pontosan. Például, ha a hazatérés be van kapcsolva, és a modell elérte a programozott kezdőhelyzetet, akkor a modell körözni fog a hely körül, ahelyett, hogy stabil lebegő pozíciót venne fel. Minél nagyobb a kör, annál nagyobb az iránytű irány hibája. Ha mindig ezt tapasztalja, akkor ez egyértelmű jele annak, hogy újra kell kalibrálnia az iránytűt.
2.3 Kalibrációs folyamat
A kalibrálás elvégzéséhez be kell lépnie a Spirit Settings/GeoLink/Module elembe, és kattintson a Kalibráció kérése / Calibration reaquest gombra. Most már leválaszthatja az áramellátást és az USB interfész vezetékét a modelltől.
- A modell következő bekapcsolásakor azonnal észreveszi a GeoLink 3-s sorozatú gyors LED villogását.
- A Status LED ilyenkor a kalibrálás előrehaladását jelzi. A gömb utánzásához kezdje el a modellt minden lehetséges irányban és szögben mozgatni. A LED villanásai jelzik, hogy új kalibrálási adatokat vett az egység.
- Forgassa addig a modullal a modellt, amíg nem észleli a szabályos, periódikus LED villogást. Ezen a ponton a kalibrálás befejeződött. A tápfeszültség újbóli bekapcsolása után a modul készen áll a működésre.
A 600 -nál nagyobb osztályú helikopterek esetén a kalibrálást javasoljuk a GeoLink felszerelése előtt elvégezni. Ilyen módon kényelmesebb és könnyebb végrehajtani.
A kalibrálást ideális esetben a repülőtéren kell elvégezni, de általában beltérben is lehet.
A kalibrálási folyamat csak akkor fejeződik be, amikor teljesen, és sikeresen végre hajtották. Ha a tápellátást kikapcsolja, miközben a kalibrálás még nem fejeződött be, a kalibrálási folyamat a következő bekapcsoláskor az elejétől kell kezdeni.
3 Hogyan kell konfigurálni
Az első lépésben a pilótának el kell döntenie, hogy melyik GeoLink funkciót kívánja használni. Az egyes funkciók működéséről kérjük, látogasson el a Szolgáltatások oldal. A pilóta több funkciót engedélyezhet egyszerre, ha szükséges.
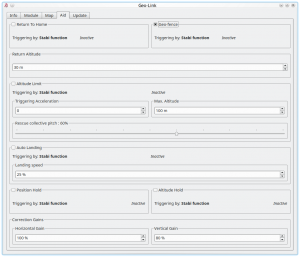
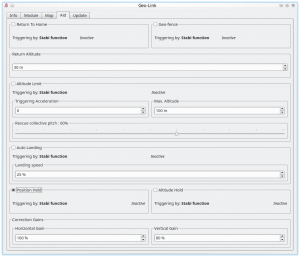
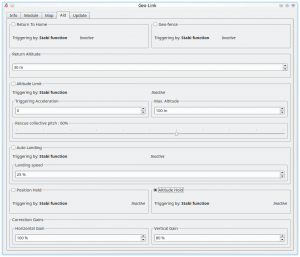
Ellenőrizze a használni kívánt szolgáltatást, funkciót a GeoLink ablak, Segédlapján [Aid] fülön. Miután engedélyezte a használandó paramétereket, elérhetőek lesznek a kiválasztott szolgáltatások. Ezekkel a paraméterekkel a kiválasztott szolgáltatás viselkedése testre szabható, az igényeknek megfelelően. Az első próbálkozásokhoz javasoljuk az alapértelmezett értékek használatát.
3.1 Aktiválás [Triggering]
Az Aid fül-ön ellenőrizheti, hogy aktiváláskor a mechanizmus megfelelően működik-e még a tényleges repülés előtt. Ha egy funkció be van kapcsolva, akkor az AKTÍV, egyéb más esetben Inaktív üzenet jelenik meg.
Biztonsági okokból ne kapcsoljon be semmilyen GeoLink funkciót, amíg a modell a megfelelő magasságot el nem éri.
3.1.1 Stabi funkció
Alapértelmezés szerint az összes GeoLink szolgáltatás elérhető, amint a Stabi funkció aktív. Például ha a Koaxiális vagy a mentési (Rescue) mód aktív a GeoLink szolgáltatásai kiegészítik a Stabi/Funkció működését szimultán, egyidejű működéssel. Javasoljuk, hogy állítsa a Stabi/Function funkciót Koaxiális üzemmódba a Geo-kerítés, a Hazatérés és a Pozíciótartás szolgáltatásokhoz!
3.1.2 Dedikált GeoLink csatorna
Alternatív megoldásként a GeoLink funkciót hozzárendelheti bármelyik szabad csatornához az Általános/Csatornák [General/Chanels] ablakban. A Spirit Settings szoftver képernyőjének jobb oldalán válassza ki azt a funkciót, amelyet hozzá szeretne rendelni: (például F: Hazatérés). Ezután válassza ki azt a csatornát, amelyet használni fog. Ugyanazt a csatornát egyszerre több szolgáltatáshoz is felhasználhatja.
4 Geo-kerítés [Geo-Fence]
A szolgáltatás bekapcsolásához kattintson a Jelölő négyzetre a GeoLink ablakban a Segítség [Aid] fülön.
4.1 Használat
A funkció bármikor aktiválható az adóból érkező paranccsal. Fontos eldöntenie, hogy a szolgáltatást milyen módon akarja aktiválni, - mivel két lehetőség van.
Bekapcsolás a Stabi funkcióval - ebben az esetben a szolgáltatás akkor érhető el, ha a programozott Stabi funkció be van kapcsolva. Ez azt jelenti, hogy nem kell más kapcsolót kiosztania, amikor pl. a Stabilizációs módot használja. Ha dedikált GeoLink csatornán akarja elérni, akkor az F: GeoLink Fence funkciót hozzá kell rendelni az Általános/Csatorna (General/Chanels) fülön egy rendelkezésre álló csatornához.
Kérjük, ellenőrizze, hogy a Geo-kerítés területét meghatározta-e.
4.2 Üzemmódok
Ha a Geo-kerítést, a hozzárendelt GeoLink-csatornán kapcsolja be, célszerű háromállású kapcsolót használni, ha egy új Geo-kerítés-területet szeretne programozni. A Csatornák Ablakban [Chanel Window] láthatja a Funkció Be (On) (1), Ki (Off) és Be (On) (2) funkciót, amely +100%, 0% és -100% csatornaértéknek felel meg.
Ha az On (1) jelenik meg kijelzőn, ez azt jelenti, hogy ekkor a Geo-kerítés be van kapcsolva és a repülési terület korlátozott. A modell visszatér, a terület közepére, - ha kilépett belőle. Ezután a pilótának újra be kell kapcsolnia a funkciót, hogy folytatni, tudja a repülést.
Ha On (2) jelenik meg, az egység programozási módban van, amely lehetővé teszi az aktuális Geo-kerítés felülírását az új helyzetnek megfelelően, amelyben a modell éppen tartózkodik. Felhívjuk figyelmét, hogy a felülírás nem fog működni, ha a modell repül, vagy ha a GNSS jel nagyon gyenge.
4.3 Új földrajzi kerítés programozás
A Geo-kerítést akár a Spirit Setting beállításokkal is programozhatja, ha kiválasztja a pontokat a térképen. Vagy lehetőség van a GeoLink csatorna használatával erre akkor is, ha nincs kéznél a számítógépe.
If assigned GeoLink channel is used you have to set On (2) function state and keep it on for at least 2 seconds. At this period Status LED of the unit will turn off and after 2 seconds new Geo-fence point is programmed. Pilot has to define two points that will determine new area diagonally. To program both points pilot have to engage the programming two times. From two diagonal points a rectangular area is calculated. After the first point programming the Status LED at the Spirit will be still Off. After the second point programming the LED must turn On which will signalize success. New area is applied immediately.
5 Altitude Limit
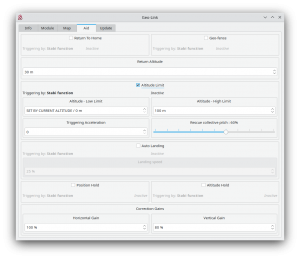
To enable this feature it is required to tick the CheckBox in the GeoLink window/Aid tab.
5.1 Usage
The feature can be engaged at any given time by a command from your radio. It is important to decide in which way the feature can be engaged as there are two options.
- To engage with Stabi function - in this case the feature is engaged when programmed Stabi function is engaged. This mean you do not need to assign any other switch than when used for e.g. Stabilisation mode
- To engage with assigned GeoLink channel - it is required to assign F: GeoLink Altitude Limit function in the General/Channels to an available channel.
5.1.1 Triggering Acceleration
This parameter is key for engaging the Rescue mode fast enough if your model is approaching towards the ground. The faster is descending velocity, the faster the Rescue is engaged. This mean that the Rescue can be engaged above configured Minimum limit to save the model safely. If model is approaching the Minimum limit slowly then the rescue is engaged at configured level. Low Triggering Acceleration value is causing only minor difference.
6 Return to Home
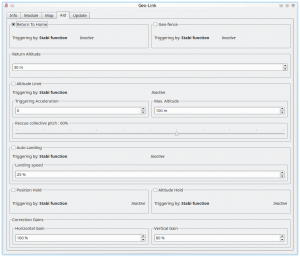
To enable this feature it is required to tick the CheckBox in the GeoLink window/Aid tab.
6.1 Usage
The feature can be engaged at any given time by a command from your radio. It is important to decide in which way the feature can be engaged as there are two options.
- To engage with Stabi function - in this case the feature is engaged when programmed Stabi function is engaged. This mean you do not need to assign any other switch than when used for e.g. Stabilisation mode
- To engage with assigned GeoLink channel - it is required to assign F: GeoLink Return to Home function in the General/Channels to an available channel.
6.2 Modes
If Return to Home is engaged by assigned GeoLink channel there is possibility to use tri-state switch also for programming of a new Home spot. In the Channels window you will be able to see Function as On (1), Off and On (2) which is corresponding to 100%, 0% and -100% channel value.
When On (1) is displayed it mean that at this point Return to Home is engaged and model will move at the Home spot.
When On (2) is displayed the unit is in a programming mode which allow to overwrite current Home spot to the new with position at which the model currently is. Please note that it will not work if model is flying or if GNSS signal is very weak.
6.3 New Home position
It is possible to program the Home position either with the Spirit Settings by selecting a point at the Map. Or there is possibility to use GeoLink channel to do so even if you are out of a computer.
If assigned GeoLink channel is used you have to set On (2) function state and keep it on for at least 2 seconds. At this period Status LED of the unit will turn off and after 2 seconds new Home position is programmed. Once finished the LED must turn On again.
7 Auto Landing
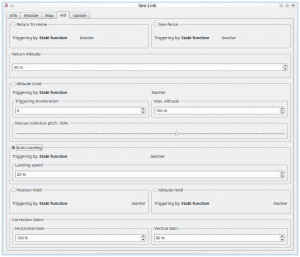
To enable this feature it is required to tick the CheckBox in the GeoLink window/Aid tab.
7.1 Usage
The feature can be engaged at any given time by a command from your radio. It is important to decide in which way the feature can be engaged as there are two options.
- To engage with Stabi function - in this case the feature is engaged when programmed Stabi function is engaged. This mean you do not need to assign any other switch than when used for e.g. Stabilisation mode
- To engage with assigned GeoLink channel - it is required to assign F: GeoLink Auto Landing function in the General/Channels to an available channel.
8 Position Hold
To enable this feature it is required to tick the CheckBox in the GeoLink window/Aid tab.
8.1 Usage
The feature can be engaged at any given time by a command from your radio. It is important to decide in which way the feature can be engaged as there are two options.
- To engage with Stabi function - in this case the feature is engaged when programmed Stabi function is engaged. This mean you do not need to assign any other switch than when used for e.g. Stabilisation mode
- To engage with assigned GeoLink channel - it is required to assign F: GeoLink Position Hold function in the General/Channels to an available channel.
9 Altitude Hold
To enable this feature it is required to tick the CheckBox in the GeoLink window/Aid tab.
9.1 Usage
The feature can be engaged at any given time by a command from your radio. It is important to decide in which way the feature can be engaged as there are two options.
- To engage with Stabi function - in this case the feature is engaged when programmed Stabi function is engaged. This mean you do not need to assign any other switch than when used for e.g. Stabilisation mode
- To engage with assigned GeoLink channel - it is required to assign F: GeoLink Altitude Hold function in the General/Channels to an available channel.
9.2 Modes
If Altitude Hold is engaged by assigned GeoLink channel there is possibility to use tri-state switch also for disabling Collective Pitch input. In the Channels window you will be able to see Function as On (1), Off and On (2) which is corresponding to 100%, 0% and -100% channel value.
When On (1) is displayed it mean that altitude in which the feature was engaged will be held. Pilot is still able to change Collective Pitch, but in a limited manner. Collective Pitch reaction will be slower than in a normal flight mode.
When On (2) is displayed it mean that altitude in which the feature was engaged will be held. Pilot is unable to change Collective Pitch by pitch stick. So that Collective Pitch steering is fixed and is changed only by GeoLink in order to hold right altitude.
10 Correction Gains
GeoLink features are doing a certain movements to achieve desired position of the model. These movements are small corrections which are dependent on parameters of the model. For very agile models these correction can be smaller. While for heavy and big models you might need bigger in order to reduce time required to achieve desired position.
10.1 Horiontal Gain
Horizontal gain affects features such as Geo-fence, Return To Home and Position Hold. For example if Return to Home feature is engaged and it takes too long to return at programmed home spot it is necessary to increase Horizontal correction. Too high value will result in excess (too visible) corrections even when model is maintaining spot on position.
10.2 Vertical Gain
Vertical gain affects features such as Altitude Limit and Altitude Hold.

