Difference between revisions of "Jeti Integration/ru"
(Created page with "Настройка Spirit") |
(Created page with "Теперь можно включить Spirit. Мы рекомендуем подавать питание через порты AUX1,AUX2 и/или CH0. Перед тем...") |
||
| Line 46: | Line 46: | ||
== Настройка Spirit == | == Настройка Spirit == | ||
| − | + | Теперь можно включить Spirit. Мы рекомендуем подавать питание через порты AUX1,AUX2 и/или CH0. | |
| − | + | Перед тем как начать использовать интеграцию, необходимо настроить тип приемника EX Bus на вкладке Основное программы настройки. Запустите программу и измените тип приемника, как показано на скриншоте. | |
| − | + | ||
[[File:Jeti-settings.png|thumb|center]] | [[File:Jeti-settings.png|thumb|center]] | ||
Revision as of 15:38, 18 October 2018
Начиная с версии 1.1.0 вы можете использовать Jeti интеграцию! Это значит что можете полностью настроить Spirit с передатчика и без использования ПК.
Contents
1 Требования
Чтобы все заработало, потребуется:
- Аппаратура Jeti Duplex : DC/DS 14 or 16 or 24
- Приемник Jeti Duplex со свободным портом EX.
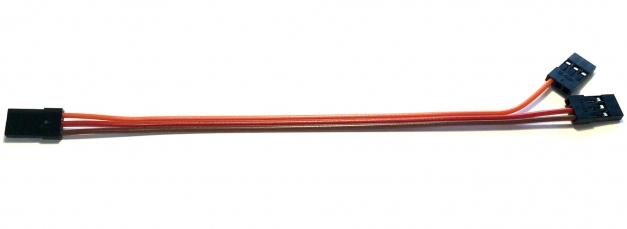
- Интеграционный кабель Jeti доступный в нашем магазине.
- Файл настройки. для передатчика.
2 Подключение.
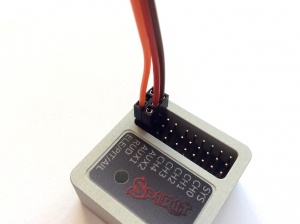
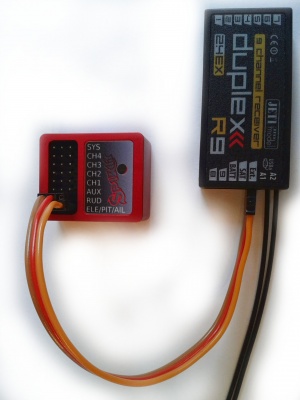
Кабель Jeti может передавать данные каналов управления и телеметрийные данные и кроме этого кабеля, других подключений делать не нужно.
Приемник подключается через порт EX Bus.
- Для новых приемников REX, порт имеет название E1 или E2 (порт EXT работать не будет).
- Приемники старого образца EX имеют маркировку порта EXT.
Если вы используете приемник EX с подключенным телеметрийным датчиком в порт EXT, есть два варианта:
- Использовать подключение UDI (для приемников типа SRXL/SUMD) - в этом случае вы лишаетесь интеграции.
- Приобрести REX приемник, который можно использовать одновременно с телеметрийными датчиками и интеграцией.
3 Подготовка передатчика
Скачайте файл Файл настройки, с расширением BIN. Имя файла "Spirit.bin". Скопируйте файл в папку "Devices" на SD карте передатчика. Без него вы увидите сообщение об ошибке при открытии устройства Spirit.
Его можно скопировать подключив кабель micro USB к передатчику и используя его как Flash накопитель. Когда подключите кабель к передатчику, подтвердите соединение. Перетащите мышкой файл в папку Devices.
Крайне важно использовать ту же версию BIN файла что и версия прошивки в Spirit.
4 Настройка Spirit
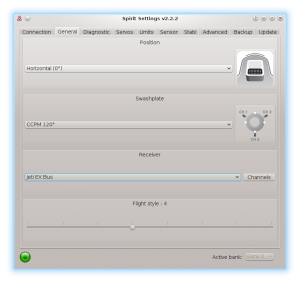
Теперь можно включить Spirit. Мы рекомендуем подавать питание через порты AUX1,AUX2 и/или CH0. Перед тем как начать использовать интеграцию, необходимо настроить тип приемника EX Bus на вкладке Основное программы настройки. Запустите программу и измените тип приемника, как показано на скриншоте.
5 Integration Menu
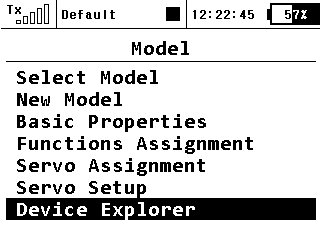
When unit is initialized you are able to enter the Jeti Integration menu. Press the MENU button on the transmitter.
Then select the Model menu by a rotary knob.
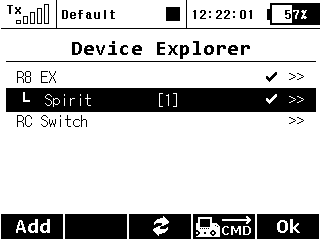
And then enter the Device Explorer menu.
There, if the wiring and receiver type is correct, you will see the Spirit entry.
5.1 Stil can't see the Spirit?
If you have everything right, but the unit is still not visible, then the only problem can be that the EX Bus port of your receiver is configured to a different protocol.
In this case, enter the configuration menu of your receiver in the Device Explorer - the entry has name of your receiver. Change the Serial Link to the EX Bus. In case of the REX receivers you can assign E1 or E2 port to EX Bus in the Alternative Pin Config menu.
6 Usage
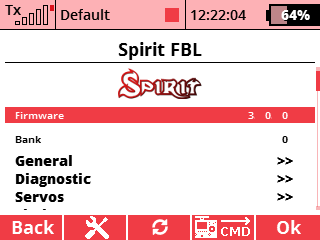
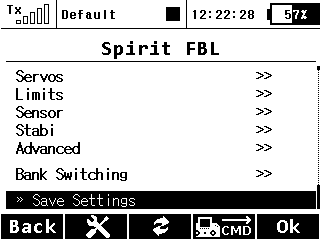
Whenever you want to configure a parameter, go to the Model/Device Explorer/Spirit. There the Menu Layout is nearly identical with the PC software to have easy navigation.
It is working in the same way as when the PC software is connected. This mean that when Jeti Integration menu is opened, you can change even the basic parameters that could affect the helicopter significantly.
When using the Bank Switching or Real-Time tuning features the menu will take full control of it. The unit will not react to a Switch position changes. For the Bank Switching there is a menu Bank Switching where you can manually change the banks.
Always close the integration menu with Close the menu. Otherwise Bank Switching or Real-Time tuning features will be temporarily disabled.
Do not forget to click the Save Settings when you want to save a changes permanently.
7 Preset for transmitter
You can use our preconfigured profile for the transmitter where everything should be configured to be ready to fly.
The profile has enabled:
- Flight modes
- Bank Switching
- Rescue/Stabilisation modes (activated by a Separate channel)
You can download it right here (Optimized for Jeti DS-14). Then unzip the file and save the JSN file to your transmitter (SDCard) to the Model directory.
In your transmitter there will be new profile called Spirit FBL that you can select.
Enjoy the integration!
8 Channel Mapping
In case that your channels are not matching, we recommend to leave default channel mapping in the unit and to change it in your transmitter.
You can do so in the Model - Servo Assignment menu.
Channel Layout:
- Throttle
- Aileron
- Elevator
- Pitch
- Rudder
- Gyro sens.
- Bank (if used)
- Stabi (if used)
9 Telemetry data
In order to display Telemetry data you have to scan for new sensors first. Go to Menu - Timers/Sensors - Sensors/Logging Setup and then press AUTO button. Scanning will take a few seconds untill all Telemetry variables will show up.
- S Vibes [%] - Vibration level from all axes (0 - 10% is normal level)
- S RPM [Head RPM] - RPM provided by RPM sensor.
- S Voltage [V] - ESC Telemetry | Main Battery voltage
- S Current [A] - ESC Telemetry | Main Battery current
- S Capacity [mAh] - ESC Telemetry | Main Battery consumed capacity
- S Temp [°C] - ESC Telemetry | FET temperature
Once scanning is finished you can add these variables onto the main screen. Go to Menu - Timers/Sensors - Displayed Telemetry and press the ADD button. Add all Telemetry data you want to display.
