Difference between revisions of "Futaba Telemetry"
| Line 53: | Line 53: | ||
|} | |} | ||
| + | {{Quote|<translate>The FrSky Integration cable is not able to carry power to the receiver. For this purpose you will need to add a normal servo cable between receiver and unit to a free port (for example AUX, AUX2, CH0). Alternatively you can use one additional wire and connect it to the middle pin of the RUD that is not connected.</translate>}} | ||
| + | <p></p> | ||
{{Info|[[File:Info.png|18px|]] <translate>Make sure that the receiver is bound in the FASSTest mode, otherwise telemetry will not work.</translate>}} | {{Info|[[File:Info.png|18px|]] <translate>Make sure that the receiver is bound in the FASSTest mode, otherwise telemetry will not work.</translate>}} | ||
<p></p> | <p></p> | ||
Revision as of 09:05, 11 August 2017
From version 2.4.3 you can utilize full support of the Futaba Telemetry!
This mean you can see all telemetry variables sent by Spirit units with S.BUS2 (FASSTest receiver) in real-time.
Contents
1 Requirements
To make it work you will need:
- Futaba transmitter: 14SG, 18MZ or 18SZ
- FASSTest receiver: R7003SB, R7006SB, R7008SB, R7014SB or R7018SB.
- FrSky Integration cable available in our stores (with a small modification).
- Spirit firmware: 2.4.3.
2 Cable modification
To allow telemetry transmission the FrSky Integration cable must be modified. For this purpose you will need a servo' plastic plug (already included with the cable).
Modification of the shorter end
- Use a needle to free-up the Red and Orange wires from the plastic.
- Then plug the Red wire from the middle to the previous position of the Orange.
- Plug the Orange wire to a separate servo plastic (at signal position).
3 Wiring
The FrSky Integration cable is able to transfer everything including channel data and telemetry. This mean that you will not need to connect anything else except this cable.
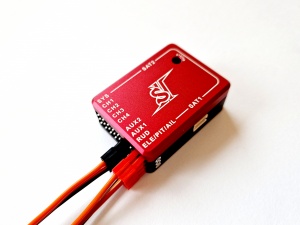
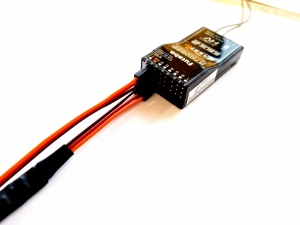
Shorter lead of the cable receiver - S.BUS2 Longer lead of the cable unit - RUD and ELE/PIT/AIL (see the photo)
The FrSky Integration cable is not able to carry power to the receiver. For this purpose you will need to add a normal servo cable between receiver and unit to a free port (for example AUX, AUX2, CH0). Alternatively you can use one additional wire and connect it to the middle pin of the RUD that is not connected.
Make sure that the receiver is bound in the FASSTest mode, otherwise telemetry will not work.
Spirit: If S-BUS Adapter is used with Spirit, then it will be replaced by the FrSky Integration cable.
Spirit Pro & uSpirit: Servo cable that was used for connection between receiver and unit will be replaced by the FrSky Integration cable.
4 Transmitter preparation
4.1 Configuration
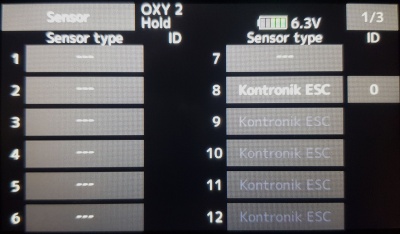
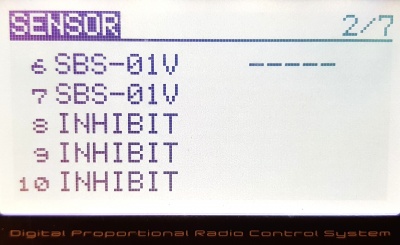
- Power up the transmitter and from the Main screen go to the LINKAGE MENU (LNK button) and then to the SENSOR page.
- At the 1th position slot select ROXXY ESC as the Sensor. This will overwrite automatically 5 slot positions.
- For the 6th position slot select SBS-01V as the Sensor. This will overwrite automatically next 2 slot positions. So that 7 slot positions will be utilized.
At this point your transmitter is ready.
5 Telemetry data
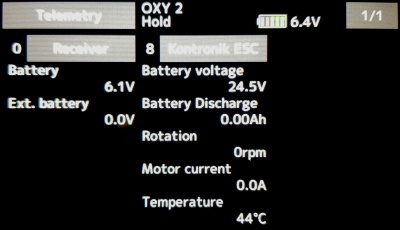
In order to display Telemetry data, move the roller while on the Main screen until you will see ESC Status.
If you can't see the ESC Status, please make sure you have performed necessary configuration.
List of available Telemetry variables:
- Rx-BATT [V] - BEC Voltage (provided by the receiver)
- EXT-VOLT [V] - Voltage measured on external wires (optionally connected to the receiver)
- CURRENT [A] - ESC Telemetry | Main Battery current
- VOLTAGE [V] - ESC Telemetry | Main Battery voltage
- CAPACITY [mAh] - ESC Telemetry | Main Battery consumed capacity
- RPM [Head RPM] - RPM provided by RPM sensor or ESC.
- TEMP [°C] - ESC Telemetry | FET temperature of the ESC
- BATTERY [V] - ESC Telemetry | BEC Voltage (provided by unit)
- EXT-VOLT [%] - (Vibration level 0 - 10% is normal level)


