Difference between revisions of "TelMe Telemetry/it"
(Created page with "Collegare il cavo di telemetria alla porta del satellite Spektrum principale (SAT1) nell'unità. Le unità Spirit più piccole utilizzeranno l'unica porta satellitare Spektrum...") |
(Created page with "Il connettore JST a 5 pin del cavo Telem KONTRONIK v2 deve essere collegato all'ESC. In caso di Kontronik KOSMIK, utilizzare la porta al centro.") |
||
| Line 17: | Line 17: | ||
[[File:unit-telemuni.jpg|350px]] | [[File:unit-telemuni.jpg|350px]] | ||
| − | 5 | + | Il connettore JST a 5 pin del cavo Telem KONTRONIK v2 deve essere collegato all'ESC. In caso di Kontronik KOSMIK, utilizzare la porta al centro. |
[[File:esc-kontronik.jpg|350px]] | [[File:esc-kontronik.jpg|350px]] | ||
Revision as of 11:06, 14 January 2021
Gli ESC Kontronik utilizzano uno speciale connettore a 5 pin per la trasmissione dei dati di telemetria all'unità. Per consentire la telemetria ESC, è necessario aver aggiornato l'ESC almeno alla versione firmware 1.13 (JIVE PRO) e 4.14 (KOSMIK). Le versioni precedenti non supportano il protocollo TelMe.
Contents
1 Cavo di telemetria
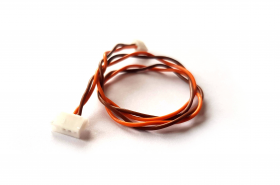
Per consentire la trasmissione dei dati di telemetria è necessario il 'Cavo Telem KONTRONIK v2' . Questo cavo è disponibile nel nostro Eshop.
Si sconsiglia di realizzare questo cavo in casa poiché un collegamento improprio causerà danni permanenti all'unità.
2 Interfaccia
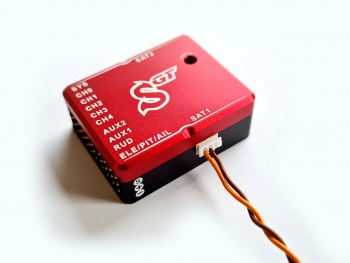
Collegare il cavo di telemetria alla porta del satellite Spektrum principale (SAT1) nell'unità. Le unità Spirit più piccole utilizzeranno l'unica porta satellitare Spektrum nativa (μSpirit - porta SAT).
Il connettore JST a 5 pin del cavo Telem KONTRONIK v2 deve essere collegato all'ESC. In caso di Kontronik KOSMIK, utilizzare la porta al centro.
3 Spirit Settings
Power up the ESC and start the Spirit Settings as usually.
3.1 Telemetry activation
As the last step you have to set the ESC Telemetry in the Spirit Settings software.
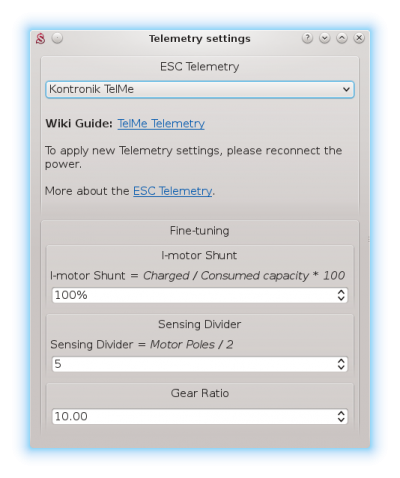
Go to the Advanced/Telemetry settings and set the Kontronik TelMe option.
Then close the window and save the settings (CTRL+S). Finally, reconnect battery from the ESC.
From this moment, everything should work.
4 Displaying telemetry data
You can display telemetry data directly in your radio from now.
How to display the data is described in the integration guides:
5 Supported models
|
Model |
Battery Voltage |
Battery Current |
BEC Voltage |
Consumed Capacity |
ESC Temperature |
RPM |
|---|---|---|---|---|---|---|
| KOLIBRI 140 LV | ✔ | ✔ | ✔ | ✔ | ✔ | ✔ |
| JIVE PRO 80+ HV | ✔ | ✔ | ✔ | ✔ | ✔ | ✔ |
| JIVE PRO 120+ HV | ✔ | ✔ | ✔ | ✔ | ✔ | ✔ |
| KOSMIK 160 HV | ✔ | ✔ | ✔ | ✔ | ✔ | ✔ |
| COOL KOSMIK 160 HV | ✔ | ✔ | ✔ | ✔ | ✔ | ✔ |
| KOSMIK 200 HV | ✔ | ✔ | ✔ | ✔ | ✔ | ✔ |
| COOL KOSMIK 200+ HV | ✔ | ✔ | ✔ | ✔ | ✔ | ✔ |
| COOL KOSMIK 200 HV GOLD | ✔ | ✔ | ✔ | ✔ | ✔ | ✔ |


