Difference between revisions of "YGE Telemetry"
(Marked this version for translation) |
|||
| Line 12: | Line 12: | ||
[[File:jst-servo.png|280px]] | [[File:jst-servo.png|280px]] | ||
| − | {{Quote|<translate>It is very important to modify the cable correctly, otherwise permanent damage of the Spirit unit will occur!</translate>}} | + | {{Quote|<translate><!--T:31--> |
| + | It is very important to modify the cable correctly, otherwise permanent damage of the Spirit unit will occur!</translate>}} | ||
=== <translate><!--T:29--> | === <translate><!--T:29--> | ||
| Line 88: | Line 89: | ||
Battery Voltage</translate> | Battery Voltage</translate> | ||
! | ! | ||
| − | <translate>BEC Voltage</translate> | + | <translate><!--T:32--> |
| + | BEC Voltage</translate> | ||
! | ! | ||
<translate><!--T:22--> | <translate><!--T:22--> | ||
Revision as of 20:17, 16 January 2021
YGE LVT and YGE HVT ESCs have telemetry feature built-in in the Programming port. This allows telemetry data transmission to the unit. To allow the ESC telemetry, it is necessary to have updated ESC as the older firmware versions were not supporting it.
Contents
1 Telemetry Cable
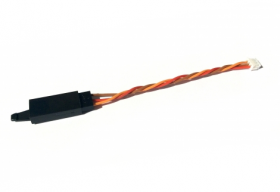
To allow the telemetry data transmission the JST-Servo adapter is required. This cable is available in our Eshop.
It is very important to modify the cable correctly, otherwise permanent damage of the Spirit unit will occur!
1.1 Cable modification
Extremely important is the following Modification of the JST-Servo adapter cable. It is required to unplug or cut RED wire of the adapter as displayed at the photo.
2 Interfacing
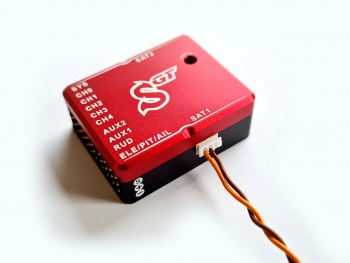
Connect modified JST-Servo adapter to the primary Spektrum satellite port in the unit. Smaller Spirit units will utilize the one native Spektrum satellite port (μSpirit - SAT port).
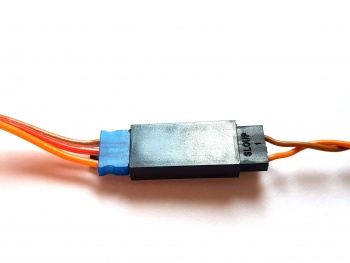
Servo connector of the JST-Servo adapter cable should be connected with the Blue Servo connector of the YGE ESC.
3 Spirit Settings
Power up the ESC and start the Spirit Settings as usually.
3.1 Telemetry activation
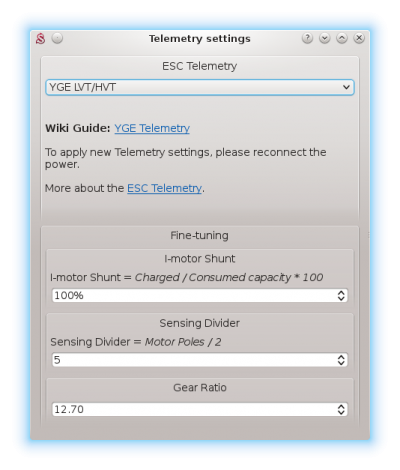
As the last step you have to set the ESC Telemetry in the Spirit Settings software.
Go to the Advanced/Telemetry settings and set the YGE LVT/HVT option.
Then close the window and save the settings (CTRL+S). Finally, reconnect battery from the ESC.
From this moment, everything should work.
4 Displaying telemetry data
You can display telemetry data directly in your radio from now.
How to display the data is described in the integration guides:
5 Supported models
|
Model |
Battery Voltage |
BEC Voltage |
Battery Current |
Consumed Capacity |
ESC Temperature |
RPM |
|---|---|---|---|---|---|---|
| YGE 35LVT | ✔ | ✔ | ✔ | ✔ | ✔ | ✔ |
| YGE 65LVT | ✔ | ✔ | ✔ | ✔ | ✔ | ✔ |
| YGE 95LVT | ✔ | ✔ | ✔ | ✔ | ✔ | ✔ |
| YGE 135LVT | ✔ | ✔ | ✔ | ✔ | ✔ | ✔ |
| YGE 90HVT Opto | ✔ | ✔ | ✔ | ✔ | ✔ | ✔ |
| YGE 120HVT Opto | ✔ | ✔ | ✔ | ✔ | ✔ | ✔ |
| YGE 165HVT Opto | ✔ | ✔ | ✔ | ✔ | ✔ | ✔ |
| YGE 205HVT | ✔ | ✔ | ✔ | ✔ | ✔ | ✔ |


