Difference between revisions of "Jeti Integration/de"
(Created page with "Sie können es kopieren, indem Sie das Mikro-USB-Kabel an den Sender, ähnlich wie ein USB-Flash-Laufwerk, anschließen. Wenn das Kabel am Sender angeschlossen ist, müssen Si...") |
(Created page with "Es ist sehr wichtig, die gleiche Version der BIN-Datei wie Ihre aktuelle Firmware im Gerät zu verwenden. Wenn die Versionen nicht übereinstimmen, können Inkompatibilitätsp...") |
||
| Line 42: | Line 42: | ||
Dann einfach per Drag & Drop in das Verzeichnis ''Devices'', so wie Sie es gewohnt sind. | Dann einfach per Drag & Drop in das Verzeichnis ''Devices'', so wie Sie es gewohnt sind. | ||
| − | '' | + | ''Es ist sehr wichtig, die gleiche Version der BIN-Datei wie Ihre aktuelle Firmware im Gerät zu verwenden. |
| − | + | Wenn die Versionen nicht übereinstimmen, können Inkompatibilitätsprobleme auftreten.'' | |
== Spirit Settings == | == Spirit Settings == | ||
Revision as of 15:27, 13 January 2017
Ab Version 1.1.0 können Sie die JETI-Integration nutzen! Das bedeutet, Sie können Spirit-Geräte völlig mit JETI-Sendern in Echtzeit konfigurieren, ohne dass ein Computer benötigt wird.
Contents
1 Requirements
Damit es funktioniert brauchen Sie:
- Jeti Duplex Sender: DC/DS 14 or 16 or 24
- Jeti Duplex-Empfänger mit einem freien EX-Port
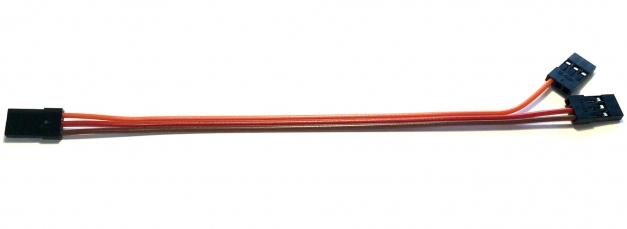
- Jeti Integrationskabel in unseren Filialen erhältlich.
- Konfigurationsdatei für den Sender.
2 Verkabelung
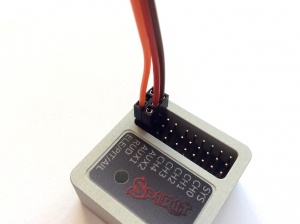
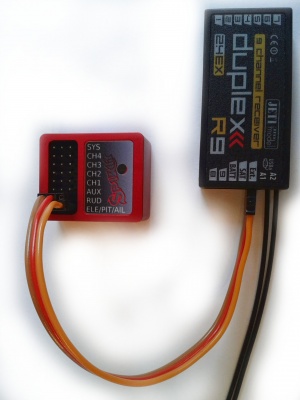
Das Jeti-Kabel ist in der Lage, alles zu übertragen, einschließlich Kanaldaten und Telemetrie. Das bedeutet, dass Sie nichts anderes als dieses Kabel anschließen müssen.
Auf der Empfängerseite muss das Servokabel an den EX-Busanschluss angeschlossen werden.
- Für neue REX-Empfänger ist die Anschlussbezeichnung EX1 oder EX2 (EXT Anschluss funktioniert nicht).
- Bei älteren EX-Receivern ist die Anschlussbezeichnung immer EXT.
Wenn Sie EX-Empfänger mit angeschlossenem Telemetriesensor zum EXT-Anschluss verwenden, haben Sie in diesem Fall zwei Möglichkeiten:
- Benutzen Sie eine UDI-Verbindung (SRXL / SUMD-Empfängertyp)- In diesem Fall verlieren Sie die Jeti-Integration.
- Kaufen Sie einen REX-Receiver, wo Sie Telemetriesensoren und die Jeti-Integration zusammen nutzen können.
3 Sender Vorbereitung
Laden Sie jetzt die Konfigurationsdatei, welche die BIN-Erweiterung hat. Der Dateiname lautet "Spirit.bin". Diese Datei sollte in das Verzeichnis "Devices" auf der SD-Karte des Senders kopiert werden. Ohne diese sehen Sie die Fehlermeldung, wenn das Spirit-Gerät geöffnet wird.
Sie können es kopieren, indem Sie das Mikro-USB-Kabel an den Sender, ähnlich wie ein USB-Flash-Laufwerk, anschließen. Wenn das Kabel am Sender angeschlossen ist, müssen Sie den USB-Anschluss bestätigen. Dann einfach per Drag & Drop in das Verzeichnis Devices, so wie Sie es gewohnt sind.
Es ist sehr wichtig, die gleiche Version der BIN-Datei wie Ihre aktuelle Firmware im Gerät zu verwenden. Wenn die Versionen nicht übereinstimmen, können Inkompatibilitätsprobleme auftreten.
4 Spirit Settings
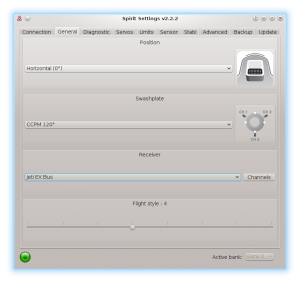
Now you are ready to power up the unit. If your Power supply is not connected yet, we recommend to connect it to the AUX1, AUX2 and/or CH0 port. Before you can utilize the Jeti Integration and EX Bus connection, it is important to set the EX Bus receiver type in the General tab of the software. Please start the Spirit Settings and change the receiver type as displayed on the photo. Then save the settings (e.g. by CTRL+S) or the Backup tab/Unit - Save and restart the unit.
5 Integration Menu
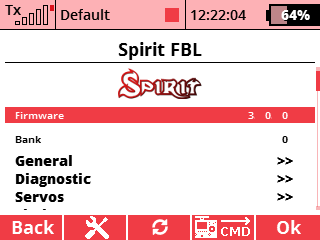
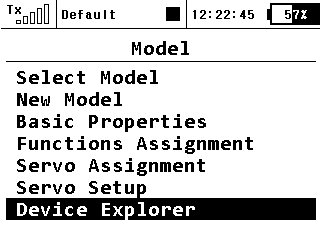
When unit is initialized you are able to enter the Jeti Integration menu. Press the MENU button on the transmitter.
Then select the Model menu by a rotary knob.
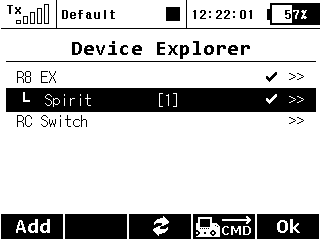
And then enter the Device Explorer menu.
There, if the wiring and receiver type is correct, you will see the Spirit entry.
5.1 Stil can't see the Spirit?
If you have everything right, but the unit is still not visible, then the only problem can be that the EX Bus port of your receiver is configured to a different protocol.
In this case, enter the configuration menu of your receiver in the Device Explorer - the entry has name of your receiver. Change the Serial Link to the EX Bus. In case of the REX receivers you can assign EX1 or EX2 port..
6 Usage
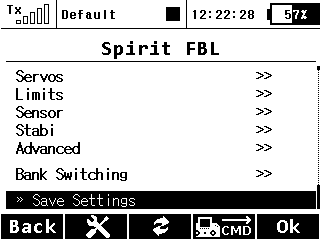
Whenever you want to configure a parameter, go to the Model/Device Explorer/Spirit. There the Menu Layout is nearly identical with the PC software to have easy navigation.
It is working in the same way as when the PC software is connected. This mean that when Jeti Integration menu is opened, you can change even the basic parameters that could affect the helicopter significantly.
When using the Bank Switching or Real-Time tuning features the menu will take full control of it. The unit will not react to a Switch position changes. For the Bank Switching there is a menu Bank Switching where you can manually change the banks.
Do not forget to click the Save Settings when you want to save a changes permanently.
Enjoy the integration!
