Difference between revisions of "Futaba Telemetry/ru"
(Created page with "Результат переделки.") |
(Created page with "Подключение") |
||
| Line 28: | Line 28: | ||
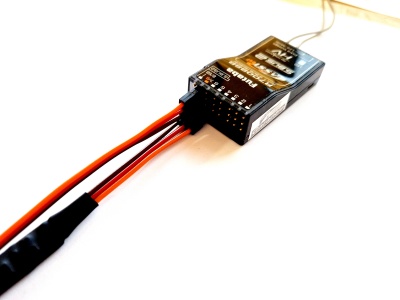
[[File:Futaba-cable-mod.jpg|thumb|center|Результат переделки.]] | [[File:Futaba-cable-mod.jpg|thumb|center|Результат переделки.]] | ||
| − | == | + | == Подключение == |
The FrSky Integration cable is able to transfer everything including channel data and telemetry. This mean that you will not need to connect anything else except this cable. | The FrSky Integration cable is able to transfer everything including channel data and telemetry. This mean that you will not need to connect anything else except this cable. | ||
Revision as of 11:50, 16 October 2018
Начиная с версии прошивки Spirit 2.4.3 вы можете использовать полную поддержку телеметрии Futaba!
Это значит, что вы можете видеть все телеметрические данные, передаваемые модулем Spirit по S.BUS2 (приемники FASSTest) в реальном времени.
Contents
1 Требования
Чтобы телеметрия заработала необходимо:
- Передатчик Futaba: 14SG, 16SZ, 18MZ or 18SZ
- FASSTest приемники: R7003SB, R7006SB, R7008SB, R7014SB или R7018SB.
- Кабель FrSky интеграции из нашего магазина ( с небольшим изменением )
- Последняя прошивка Futaba
- Spirit firmware: 2.4.3.
2 Переделка кабеля
Для передачи данных телеметрии необходимо переделать кабель FrSky интеграции. Для этого потребуется дополнительный серворазъем (прилагается к кабелю).
Переделываем длинный конец кабеля
- С помощью иголки вытащите красный провод из разъема
- Затем подключите красный провод в отдельный серворазъем в позицию для сигнального проводника.
3 Подключение
The FrSky Integration cable is able to transfer everything including channel data and telemetry. This mean that you will not need to connect anything else except this cable.
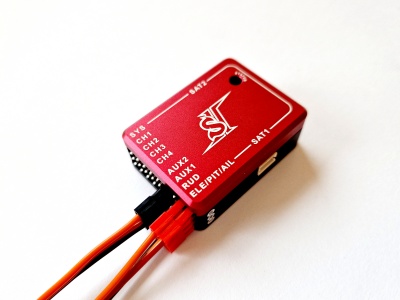
Longer lead of the cable unit - RUD and ELE/PIT/AIL (see the photo) Shorter lead of the cable receiver - S.BUS2
The FrSky Integration cable is not able to carry power to the receiver. For this purpose you will need to add a normal servo cable between receiver and unit to a free port (for example AUX, AUX2 or CH0 port connected with 8/SB). Alternatively you can use one additional wire and connect it to the middle pin of the RUD that is not connected. You can also use a secondary BEC output so no other cable is required.
Make sure that the receiver is bound in the FASSTest mode, otherwise telemetry will not work.
Spirit: If S-BUS Adapter is used with Spirit, then it will be replaced by the FrSky Integration cable.
Spirit Pro & uSpirit: Servo cable that was used for connection between receiver and unit will be replaced by the FrSky Integration cable.
4 Transmitter preparation
4.1 Configuration
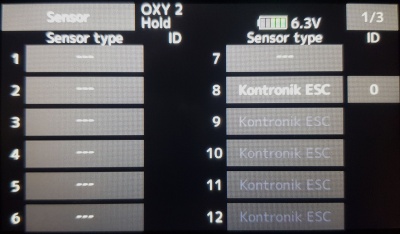
- Power up the transmitter and from the Main screen go to the LINKAGE MENU (LNK button) and then to the SENSOR page.
- For the 8th position Slot select KONTRONIK as the Sensor. This will overwrite automatically next 6 slots.
At this point your transmitter is ready.
5 Telemetry data
Now it is a proper time for configuring the ESC telemetry (if you want to use this feature).
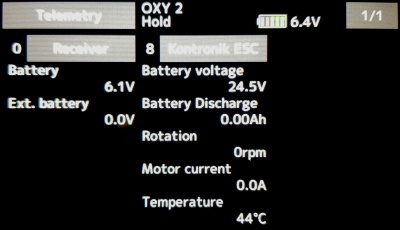
In order to display Telemetry data, go to the LINKAGE MENU and then TELEMETRY page.
It is also possible to display any variable in the TELEMETRY MONITOR accessible by clicking the HOME/EXIT button.
List of available Telemetry variables:
- Rx-BATT [V] - BEC Voltage (provided by the receiver)
- EXT-VOLT [V] - Voltage measured on external wires (optionally connected to the receiver)
- CURRENT [A] - ESC Telemetry | Main Battery current
- VOLTAGE [V] - ESC Telemetry | Main Battery voltage
- DISCHARG [mAh] - ESC Telemetry | Main Battery consumed capacity
- RPM [Head RPM] - RPM provided by RPM sensor or ESC.
- TEMP [°C] - ESC Telemetry | FET temperature of the ESC
- PWM [%] - ESC Telemetry | Throttle percentage (provided by unit)
- BEC CURRENT [%] - Vibration level (0 - 10% is normal level, 1A = 1%, provided by unit)


