Jeti Integrazione
Dalla versione 1.1.0 puoi utilizzare l'integrazione JETI! Ciò significa che puoi configurare completamente le unità Spirit con trasmettitori JETI in tempo reale senza bisogno di un computer.
Contents
1 Requisiti
Per farlo funzionare avrai bisogno di:
- Trasmettitore Jeti Duplex: DC / DS 14 o 16 o 24
- Ricevitore Jeti Duplex con una porta EX libera.
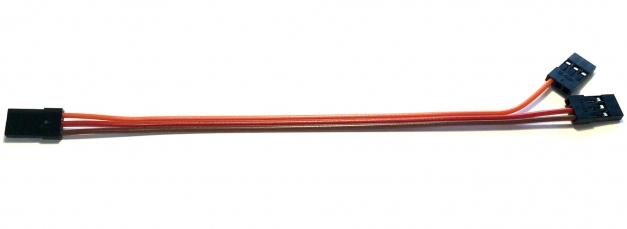
- Cavo di integrazione Jeti disponibile nei nostri negozi.
- Configurazione file per il trasmettitore.
2 cablaggio
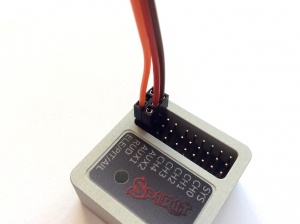
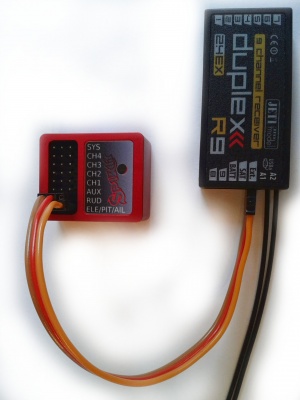
Il cavo Jeti è in grado di trasferire tutto, compresi i dati del canale e la telemetria. Ciò significa che non sarà necessario collegare nient'altro tranne questo cavo.
Sul lato ricevitore il cavo del servo deve essere collegato alla porta EX Bus.
- Per i nuovi ricevitori REX l'etichetta della porta è E1 o E2 (la porta EXT non funzionerà).
- Per i ricevitori EX meno recenti l'etichetta della porta è sempre EXT.
Se stai utilizzando ricevitori EX con sensore di telemetria collegato alla porta EXT, in questo caso hai due opzioni:
- Per utilizzare la connessione UDI (tipo di ricevitore SRXL / SUMD), in questo caso perderai l'integrazione Jeti.
- Per acquistare un ricevitore REX dove è possibile utilizzare un sensore di telemetria e l'integrazione Jeti insieme.
3 Preparazione del trasmettitore
Ora scarica il file Configurazione file, che ha estensione BIN. Il nome del file è "Spirit.bin". Questo file dovrebbe essere copiato nella directory "Devices" sulla scheda SD del trasmettitore. Senza di esso vedrai il messaggio di errore quando il dispositivo Spirit viene aperto.
È possibile copiarlo collegando il cavo micro USB al trasmettitore in modo simile a un'unità flash USB. Quando il cavo è collegato al trasmettitore, è necessario confermare la connessione USB. Quindi trascinalo e rilascialo nella directory "Dispositivi" come sei abituato.
È molto importante utilizzare la stessa versione del file BIN del firmware corrente nell'unità. Se le versioni non corrispondono, potrebbero verificarsi problemi di incompatibilità.
4 Impostazioni dello spirit
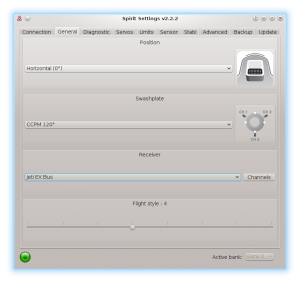
Ora sei pronto per accendere l'unità. Se il tuo alimentatore non è ancora collegato, ti consigliamo di collegarlo alla porta AUX1, AUX2 e / o CH0. Prima di poter utilizzare l'integrazione Jeti e la connessione EX Bus, è importante impostare il tipo di ricevitore EX Bus nella scheda Generale del software. Si prega di avviare le impostazioni dello spirito e modificare il tipo di ricevitore come mostrato nella foto. Quindi salvare le impostazioni (ad es. Con "CTRL + S") o la "scheda Backup / Unità - Salva" e riavviare l'unità.
5 Menu Integrazione
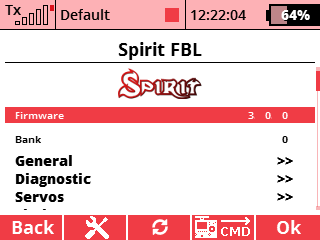
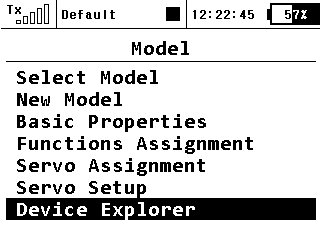
Quando l'unità viene inizializzata, è possibile accedere al menu di integrazione Jeti. Premere il pulsante MENU sul trasmettitore.
Quindi selezionare il menu Modello con una manopola.
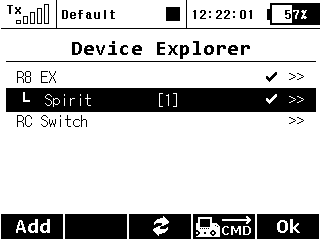
And then enter the Device Explorer menu.
There, if the wiring and receiver type is correct, you will see the Spirit entry.
5.1 Stil can't see the Spirit?
If you have everything right, but the unit is still not visible, then the only problem can be that the EX Bus port of your receiver is configured to a different protocol.
In this case, enter the configuration menu of your receiver in the Device Explorer - the entry has name of your receiver. Change the Serial Link to the EX Bus. In case of the REX receivers you can assign E1 or E2 port to EX Bus in the Alternative Pin Config menu.
6 Usage
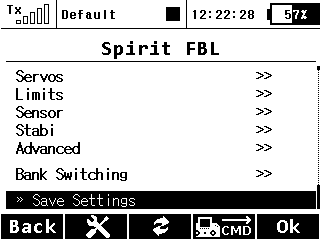
Whenever you want to configure a parameter, go to the Model/Device Explorer/Spirit. There the Menu Layout is nearly identical with the PC software to have easy navigation.
It is working in the same way as when the PC software is connected. This mean that when Jeti Integration menu is opened, you can change even the basic parameters that could affect the helicopter significantly.
When using the Bank Switching or Real-Time tuning features the menu will take full control of it. The unit will not react to a Switch position changes. For the Bank Switching there is a menu Bank Switching where you can manually change the banks.
Always close the integration menu with Close the menu. Otherwise Bank Switching or Real-Time tuning features will be temporarily disabled.
Do not forget to click the Save Settings when you want to save a changes permanently.
7 Preset for transmitter
You can use our preconfigured profile for the transmitter where everything should be configured to be ready to fly.
The profile has enabled:
- Flight modes
- Bank Switching
- Rescue/Stabilisation modes (activated by a Separate channel)
You can download it right here (Optimized for Jeti DS-14). Then unzip the file and save the JSN file to your transmitter (SDCard) to the Model directory.
In your transmitter there will be new profile called Spirit FBL that you can select.
Enjoy the integration!
8 Channel Mapping
In case that your channels are not matching, we recommend to leave default channel mapping in the unit and to change it in your transmitter.
You can do so in the Model - Servo Assignment menu.
Channel Layout:
- Throttle
- Aileron
- Elevator
- Pitch
- Rudder
- Gyro sens.
- Bank (if used)
- Stabi (if used)
9 Telemetry data
In order to display Telemetry data you have to scan for new sensors first. Go to Menu - Timers/Sensors - Sensors/Logging Setup and then press AUTO button. Scanning will take a few seconds untill all Telemetry variables will show up.
- S Vibes [%] - Vibration level from all axes (0 - 10% is normal level)
- S RPM [Head RPM] - RPM provided by RPM sensor.
- S Voltage [V] - ESC Telemetry | Main Battery voltage
- S Current [A] - ESC Telemetry | Main Battery current
- S Capacity [mAh] - ESC Telemetry | Main Battery consumed capacity
- S Temp [°C] - ESC Telemetry | FET temperature
Once scanning is finished you can add these variables onto the main screen. Go to Menu - Timers/Sensors - Displayed Telemetry and press the ADD button. Add all Telemetry data you want to display.
