Spektrum Integration
Spektrum integration is available for all the latest telemetry enabled Spektrum receivers!
This mean you can fully configure Spirit units with Spektrum transmitters in real-time without need of a computer.
Contents
[hide]1 Requirements
To make it work you will need:
- Spektrum transmitter: DX6e, DX6 Gen 2, DX6 Gen 3, DX7 Gen 2, DX8 Gen 2, DX9, DX10T, DX18 Gen 1, DX18 Gen 2, DX18T, DX18QQ, DX20, IX12, IX20, NX6, NX8, NX10
- Serial Telemetry receiver: SPM4649T, SPM4650, SPM4651, SPM9747, AR6610T.
- Cable - depending on your receiver (see Wiring section).
2 Receiver Wiring
Currently there are two different options.
- SPM4649T receiver - solution compatible with older Spektrum satellites
- SRXL2 receivers - recommended for new builds
Please note you can use SRXL2 receiver only together with other SRXL2 satellites.
2.1 SPM4649T Receiver Wiring
SPM4649T receiver connection and setup is described at the SPM4649T page.
2.2 SRXL2 Receiver Wiring
Spektrum SRXL2 receiver connection and setup is described at the Spektrum SRXL2 page.
3 Transmitter preparation
3.1 Firmware update
Update your transmitter to the latest firmware from the Spektrum Airware portal. In the menu SETUPS/UPDATES - FIRMWARE UPDATES you will find the firmware for download. The SAX file must be stored on the SDCARD and inserted in your transmitter. In the System Setup/Transfer SD Card you can select Firmware update as Option.
- DX6e does not need update (version 1.00 will work).
With the latest Spektrum NX radiso, please make sure to install the latest firmware 3.06, otherwise integration will not work.
3.2 Configuration
Power up the transmitter and in the Main menu enter the Telemetry.
Configure:
- 1: ESC
- 2: Text Gen (only for older radio firmware)
- 3: Flight Pack mAh
When adding Text Gen make sure that Display option is configured to Act or Roller (depending on radio). Please note, recent radio update do not require any Text Gen settings. After activating the integration menu, you can view the Text Gen screen by using roller at the Telemetry monitor page.
At this point your transmitter is ready. You can return to the main screen.
4 Integration Menu
Whenever unit is initialized you are able to enter the Spektrum Integration menu or watch the telemetry data.
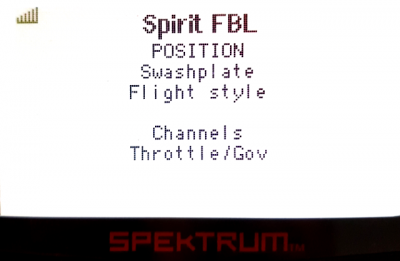
Start the transmitter and on the main screen use a roller - rotate to the right until you will see a Blank screen.
At this point the integration menu is closed so you can't accidently configure any parameter. To open the menu, move the Rudder stick to the right and Aileron stick to the left and hold for over 2 seconds. Once the menu is opened, you will see <READY> message. Now you can release the sticks and you are ready to set all the parameters.
As soon as you will want to close the Integration menu (when you will want to fly) perform the same procedure with the sticks. Move and hold the sticks (Rudder to the right and Aileron to the left) for over 2 seconds. Menu is closed successfully when <CLOSED> is displayed even if you will return the sticks back to the center. If you will not close the integration menu, it will be temporarily disabled as soon as the Throttle curve will exceed 15%. But to minimize any risk we highly recommend to close it properly.
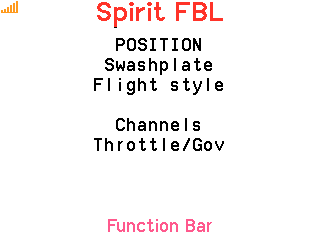
The Menu Layout is nearly identical with the PC software to have easy navigation.
It is working in the same way as when the PC software is connected. This mean that when Spektrum Integration menu is opened, you can change even the basic parameters that could affect the helicopter significantly.
To navigate in the menu you can use Aileron and Elevator sticks.
- Aileron Left - Back in the menu; Stop edit of a parameter' value.
- Aileron Right - Enter a Submenu; Edit selected parameter.
- Elevator Up - Go up in the menu or submenu; Increase value of selected parameter.
- Elevator Down - Go down in the menu or submenu; Decrease value of selected parameter.
When using the Bank Switching or Real-Time tuning features while the Integration is active, the menu will take full control over it. The unit will not react to a Switch position changes. For the Bank Switching there is a parameter Bank in the main menu where you can manually change the banks.
Do not forget to use the Save Settings when you want to save a changes permanently.
5 Telemetry data
Now it is a proper time for configuring the ESC telemetry (if you want to use this feature).
If the feature is not used, you will still get telemetry variables such as Vibration Level, Throttle percentage and possibly RPM readout as described below. These will be displayed automatically if the Transmitter preparation step was finished.
5.1 Displaying the data
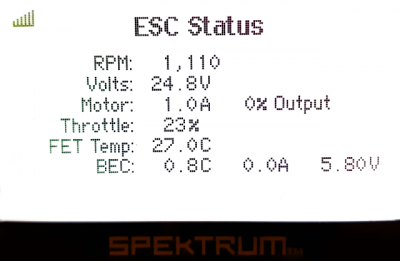
In order to display Telemetry data, move the roller while on the Main screen until you will see ESC Status.
If you can't see the ESC Status, please make sure you have performed necessary configuration.
List of available Telemetry variables:
- RPM [Head RPM] - RPM provided by RPM sensor or ESC.
- Volts [V] - ESC Telemetry | Main Battery voltage
- Motor [A] - ESC Telemetry | Main Battery current
- Throttle [%] - Throttle percentage sent to the ESC
- Output [%] - Vibration level (0 - 10% is normal level
- FET Temp [°C] - ESC Telemetry | FET temperature
- Capacity [mAh] - ESC Telemetry | Main Battery consumed capacity
- BEC [V] - ESC Telemetry | BEC Voltage
6 Troubleshooting
6.1 SPM4649T always in binding mode
This issue can be sorted so that you will re-flash the unit's Bootloader to the latest version. All units that were shipped with firmware older than 2.4.3 will need this.
It can be done easily so that you will perform the flashing process again (with the latest 4df file), but before clicking the Flash button, press CTRL+B keys. Once pressed, you will see Status: Bootloader Overwrite message. Then click the Flash button. The flashing will take little bit longer than usually (done in two stages).
Update the bootloader only if you are certain, that normal firmware flashing is working correctly on your computer.


